


Free, Secure Mac Screen Recorder
Looking to enhance your Mac screen recordings? Scribe's AI-powered Mac screen recorder can save you hours — record your screen as you work to build powerful visual guides.
Whether you're creating tutorials, presentations, or sharing your screen with team members, Scribe's screen recording software takes recordings to the next level.
 |
Record your screen activity with the click of a button, auto-generating a step-by-step guide with:
- AI-powered text and descriptions.
- Clickable links.
- Annotated screenshots.
- Mouse clicks.
The Ultimate Tool for Mac Screen Recording
Scribe's highly versatile screen capture tool offers a range of features beyond simple screen recording. It's easy to see why Scribe is loved by millions of teams and individuals around the world.
 |
Here's why:
1. Easily Capture Your Mac Screen
With Scribe, you can capture a new screen recording in seconds. The intuitive interface is easy to use — whether you're a beginner or a tech-savvy pro.
At the click of a button, Scribe records your Mac screen as you go through your process. All you have to do is click the stop button when you're done and Scribe will generate your step-by-step guide.
Capture screen recordings in real time, making even complex actions easy to understand.
2. Build User-Friendly Tutorials
Use Scribe to create clear, visual step-by-step guides that walk your audience through processes.
 |
With Scribe's Mac screen recorder tool, you can create dynamic guides in seconds that are easy to update and customize.
- Add AI-powered titles and descriptions.
- Edit text and steps.
- Add helpful tips and alerts.
- Merge steps to create engaging GIFs for a polished look.
 |
3. Share Screen Recordings With One Click
With Scribe's user-friendly interface, you can easily transform your screen recordings into shareable content for anyone — team members, customers and even family members.
 |
Record the screen and share through:
- A quick shareable link.
- Easily embedding HTML into a knowledge base or other platform.
- Exporting into PDF or Markdown (Pro).
How to Use Scribe's Mac Screen Recorder
It's super easy to get started with Scribe's Mac screen recorder tool — just install the Scribe browser extension (we recommend pinning it in your browser menu bar!).
 |
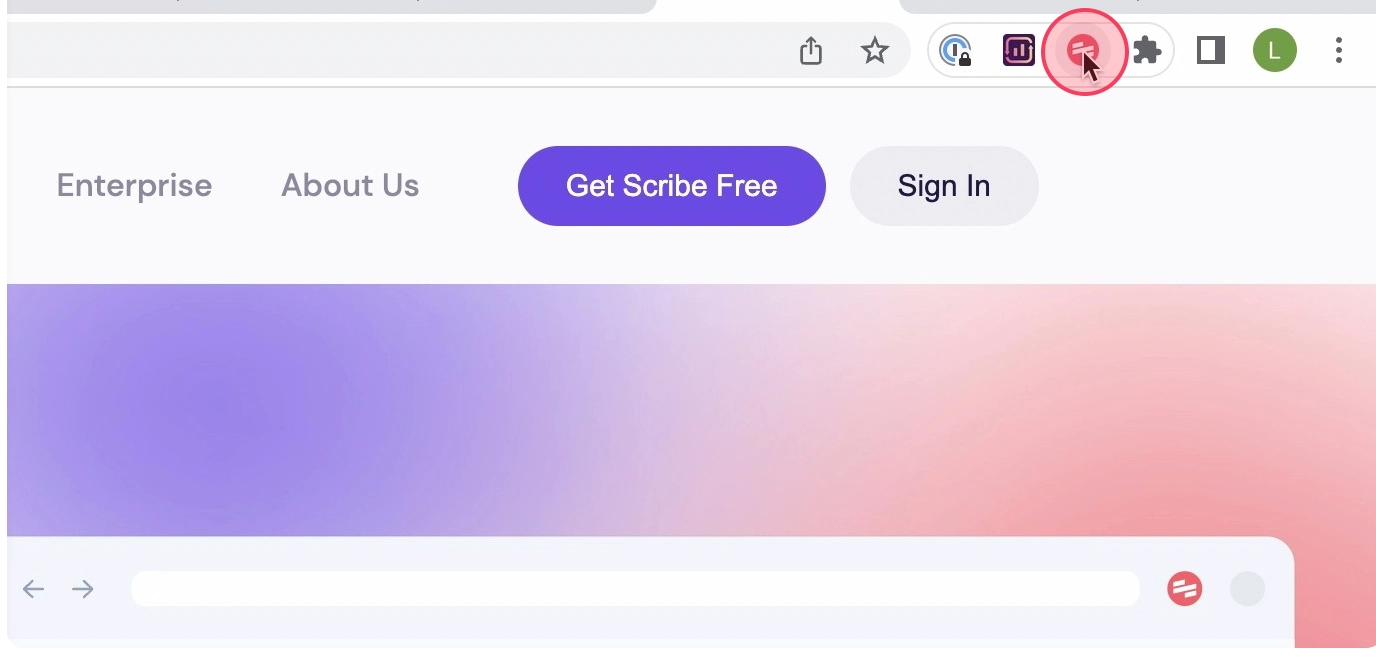
Step 1: Record Your Screen
Choose the Mac screen activity you wish to record. Click on the Scribe icon in your browser menu bar.
 |
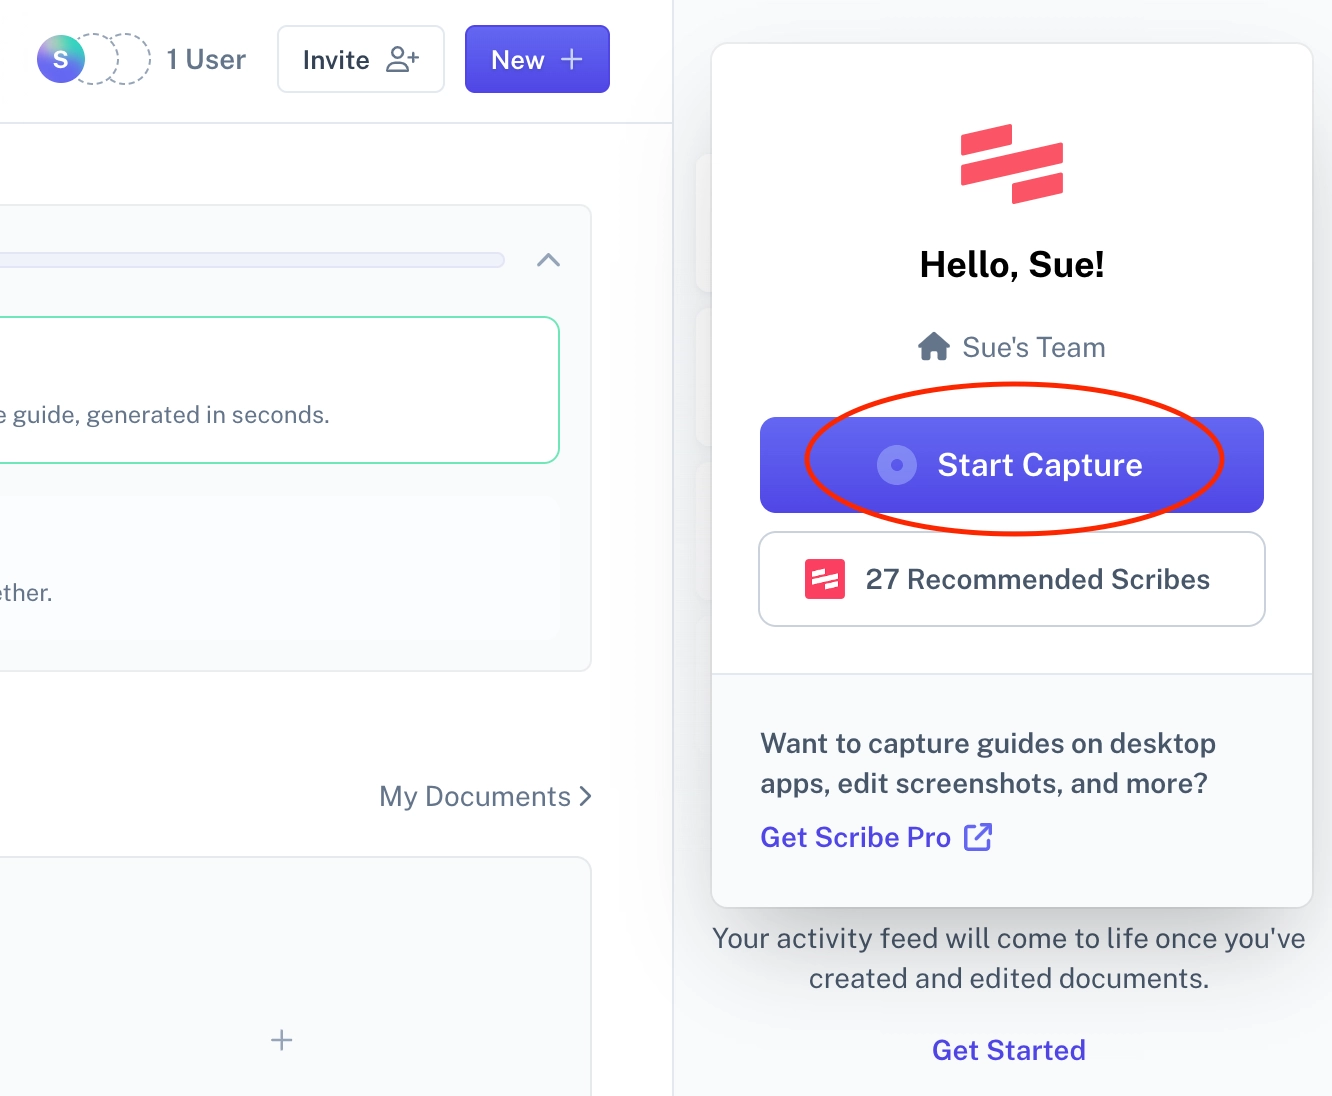
Launch Scribe's user-friendly interface to start the screen capture and record your screen.
Click the "Start Capture" button to start recording your onscreen actions.
 |
Step 2: Stop Recording
Once you've completed your tasks, click the "Stop Capture" button at the top of your screen to stop recording.
 |
Scribe auto-generates a step-by-step guide of each action you took on your Mac screen, like this one (which only took 38 seconds to create!):
 |
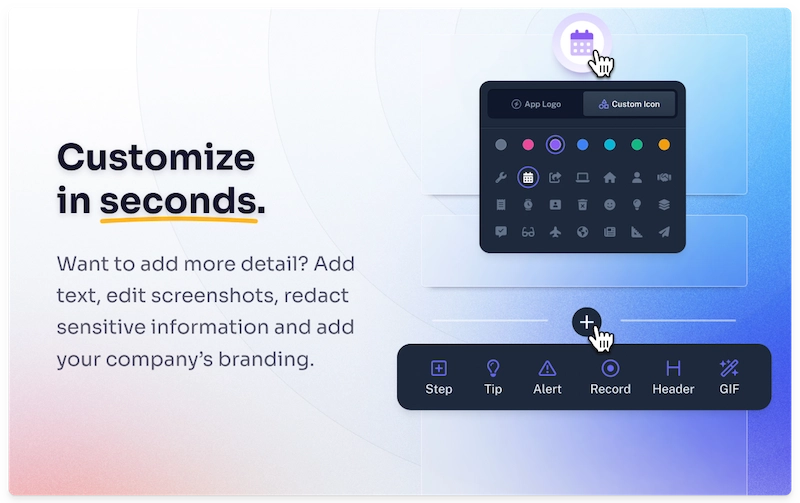
Step 3: Edit & Customize
Use Scribe's edit feature to help you perfect your screen captures. You can add:
- More steps.
- Annotations.
- Alerts.
- Helpful tips.
- Mouse click tracks.
- And other elements.
... to make your guide more engaging.
 |
With Scribe Pro and Teams Pro, you can use Scribe's editing menu items to directly edit your screenshots:
- Annotation tools: Add text callouts, pointers, and captions to provide context and a polished look.
- Highlights: Use arrows, shapes, and freehand drawing to draw attention to important information.
- Redaction: Redact sensitive information with Smart Blur.
 |
Step 4: Use AI to Build Larger Docs
Use Scribe Pages to combine multiple guides with text, images and video. Then, let AI do the rest!
 |
With a simple prompt, you can ask Scribe's AI to:
- Provide clear explanations.
- Add titles and headers.
- Edit your copy for grammar, length and tone.
- Write any type of process document: SOPs, training manuals, onboarding guides, tool walkthrough guides, and more.
 |
Step 5: Share In Seconds
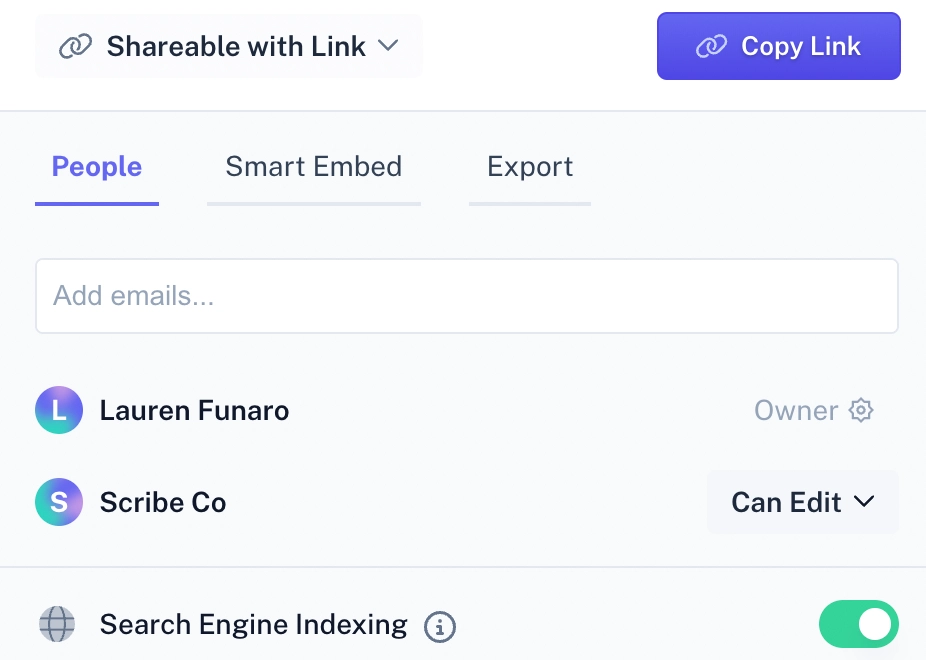 |
Share your guides in seconds — simply:
- Use a shareable link for easy access.
- Export your guide to PDF, Markdown or HTML.
- Use Scribe's platform to distribute your guides.
- Embed your guide into hundreds of platforms for seamless integration.
Learn more about what you can do with Scribe!
- Digital Guide Maker
- Desktop Capture
- Screen Recorder Tool
- Browser Screen Recorder
- Desktop Capture
- Step Recorder Software
- Documentation Generator
- Better Than a Video Tutorial
Or check out these related resources that we think you'll love!
- How to Capture Your Screen in Windows, Mac and Web Browsers.
- The 9 Best Screenshot Software for Your Mac
- The Top Tango Alternatives in 2024
- Free Training Video Software: Our Top 20 Picks
- The Best Loom Alternatives and Competitors
FAQs
What is the Mac snipping tool?
The Mac snipping tool is a built-in tool on all Mac devices that allows you to capture either the entire screen or a selected part of your screen. To access it with a keyboard shortcut, press Command-Shift-5.
For more advanced features like annotating, editing, and sharing, use a third-party option Scribe.
How to screen capture on Mac?
To capture your screen on a Mac, follow these keyboard shortcuts:
- Press and hold Shift-Command-5 simultaneously.
- To capture part of your screen, press Shift-Command-4.
- If a thumbnail of the screenshot appears in the corner of your screen, click on it to edit or share.
To capture your screen with annotated screenshots, click tracking and text, use a third-party option Scribe.
What are Mac's built-in screen recording options?
- QuickTime Player: QuickTime Player has a built-in screen recorder. To use it, open QuickTime Player and select File > New Screen Recording. You can choose to record the entire screen or part of your screen.
- Screenshot Toolbar: The Screenshot toolbar also allows you to record your screen. To access the Screenshot toolbar, use the keyboard shortcut: press Shift-Command-5.
Scribe: The Ultimate Tool for Mac Screen Recording
Scribe's Mac screen recorder tool lets you build powerful, visual instructional content in seconds. It's easy to see why so many users love Scribe's screen capture tool. Naomi West's user review sums it up:
"@ScribeHow has completely changed how I document and educate remote colleagues. In 54 seconds I can create a walkthrough of (for example) how to create a Klaviyo segment. The only thing I did was press Start Recording and Stop Recording. HOW COOL IS THIS."
Ready to get started? Record your Mac screen for free.
